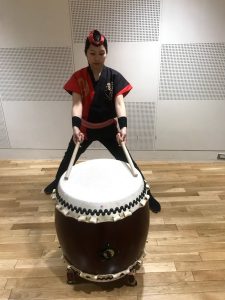
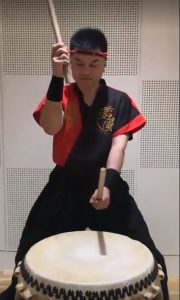
How to hit DON and KON (arm and hand coordination)
DON is the most important point in Wadaiko
Wadaiko begins with with DON and ends with DON.
All rhythm and techniques are linked from there.
It’s a very important point.
Firstly, the posture and the standing position.Then, the flexibility of the palm and the bachi manipulation.
Adding the taiko mechanics in the initial stage, can help to power up the motive power to the highest and add the leverage function of the arm, producing the vibration “DON!!”
We are going to explain how to hit the DON this time.
Depending of the instructor, the way of thinking and policy may differ, so if you fell like the explanation in this article is different of your instructor, please follow him/her.
The “taiko uchi” is characterized by hitting it in the best way, with power, flexibility, posture, speed and techniques, after researches and more researches.
How can we produce the ideal DON sound?
When hitting by power only, even making a big sound, the taiko doesn’t vibrate properly.
In baseball, to make a home-run it’s necessary to get the picture to hit the ball just in the adequate time with the center of the bat.
It’s the same for the taiko.
In order to make a good vibration an important point is to get the picture to hit the taiko with the center of the bachi, in the accurate place, just in the adequate time.
For that,
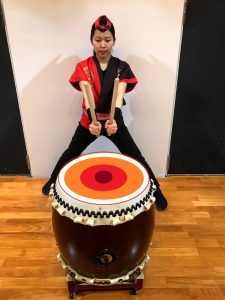
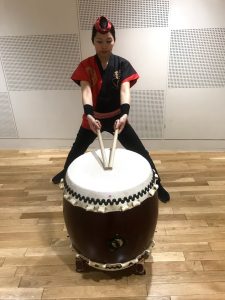
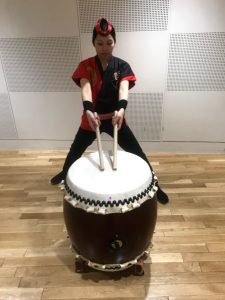
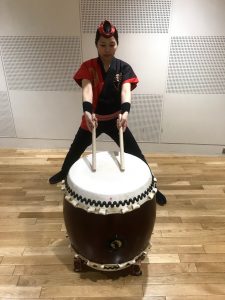
1. The basic posture form
After getting a good posture,
getting able to produce the highest kinetic energy with the minimum force in the bachi.
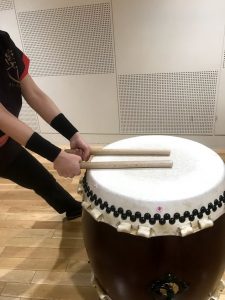
2. The bachi manipulation
is important.
And the usage of the body for doing a full swing.
Let’s make the bachi trajectory steady even when the whole body is moving.
For that, is important to understand the target ideal sound and the center.
Without the goal, it’s very difficult to achieve the destination.
The goal is the “DON!!”
At the beginning let’s try to hit the parts of the taiko and understand how differently their sounds are.
Even for the face (kawa), the sound varies depending of the location.
The picture is colored in the face (kawa). (As a reference only)
 The dark red part
is the center of the face(kawa) of the taiko and also the core of it.
Hitting here can produce a big DON sound with no extra overtunes and contact sounds.
It’s good to hit the core for making untiringly sound of a small sequence
or also for making a big DON!! as an accent of a composed rhytm.
The dark red part
is the center of the face(kawa) of the taiko and also the core of it.
Hitting here can produce a big DON sound with no extra overtunes and contact sounds.
It’s good to hit the core for making untiringly sound of a small sequence
or also for making a big DON!! as an accent of a composed rhytm.
 |
In its surrounding, there’s the red part
The sound produced here is the most similar to the DON sound and it’s made by the sound of the taiko’s face(kawa) oscillation when hitting.
|
When it comes to the orange part, the sound gets confined and it becomes more to BAN BAN than DON, having a bit of noise mixed.
Often when the sound doesn’t echo very well is because the movement is losing the focus in the bachi trajectory and it’s hitting that orange part of the taiko.
 |
|
The white part is near the edge and the vibration is almost null, making the sound PEN PEN.
It’s used when making extremely small sounds.
 |
|
White→Orange→Red→Deep red
That’s the crescent order from a small sound to the loudest one.
It’s also used as an expression or effect of something that is very far away is getting closer little by little.
It can be used as a special rendition like below
 Hit while sticking the bachi to the taiko, making a sound like a bell.
 |
 Hit strongly with one bachi, while sticking the other one to the taiko, making a sound like SUBIBIBI. That’s used as a sound effect for lightning.
 |
avoid the orange and the white area
and put the red and deep red area in target.
The first goal is the 100% Home-run hit rate.
After being able to hit 10 times consecutively in the deep red area, it may be good to challenge to hit the other parts and expand the sound variety.
The center of the taiko Hit a specific area
After having your goal,
the next is the bachi trajectory.
例えばFor example,
going to Shinagawa Sta. in Tokyo
using the Yamanote Line
it doesn’t matter if you use the inner track or the outer track
It’ll arrive your destination.
That’s the same for arriving to the destination of the center of the taiko.
電車で品川駅(あなたの身近な駅に置き換えてください)
を目指すとして
山の手線外回りを使っても内回りを使っても目的地にはたどりつけます。
太鼓の皮の真ん中にアクセスするための
ルート、軌道も
Hassou(Inner track)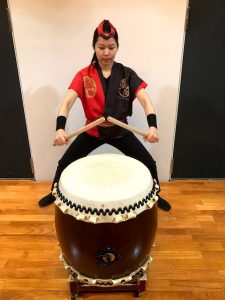 |
Gyaku Hassou (Outer track)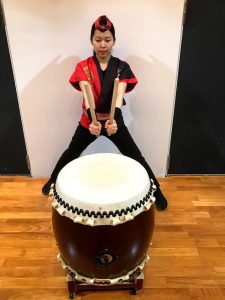 |
In order to get to the destination anytime you want,
it’s necessary that both bachi and arm are consistent
in the direction and the goal.
For example, for the goal to achieve a certain destination
there’s a driver, a conductor and a passenger
if all of them have a different goal, it’s very difficult to accomplish it.
The passenger wants to go to Shinagawa, but he ends up going to Tamachi, Tokyo, Shinjuku… or even far away like Tabata.
The role is like below.
The Japanese trains are very certain in the time
and they won’t delay unless there’s
a trouble caused by the passengers
and will arrive the destination with safety.
Here we are going to explain the positions of the elbow, arm and bachi, using the train as reference.
Arm: The driver
Speed and dynamic
 |
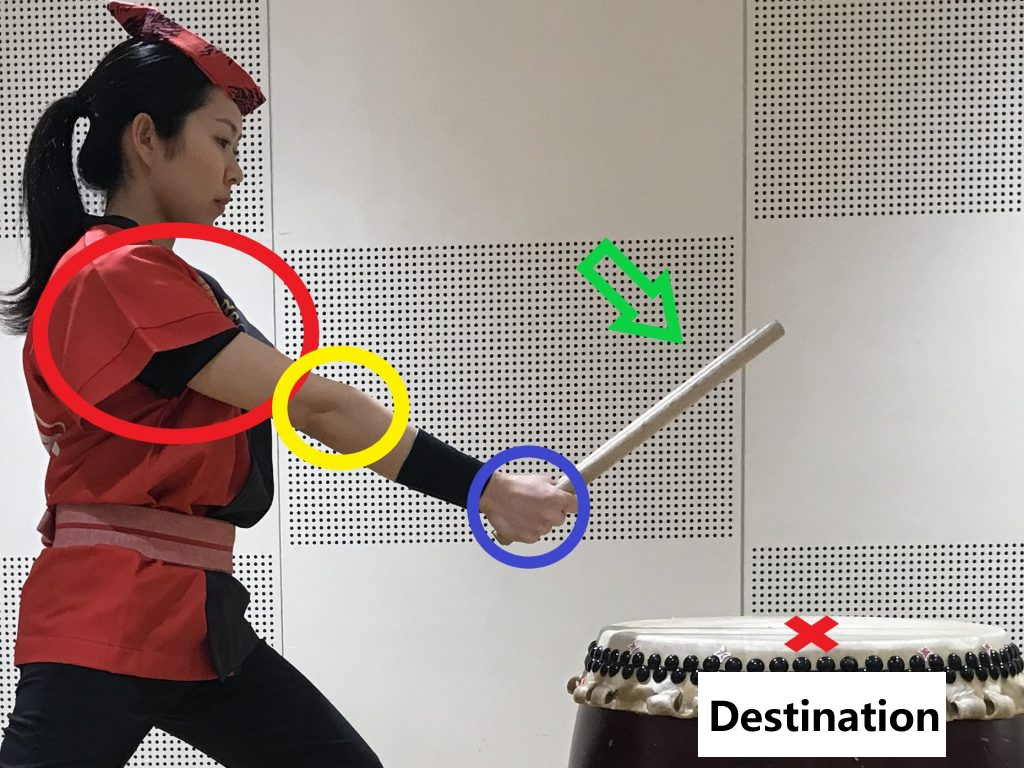 |
Elbow: The conductor
Support for the driver
 |
The arm gives the order for the dynamic, speed and momentum, which has a support from the elbow, deciding the direction.
The fist is going to carry the bachi, which are the passengers, to the destination, but in order to make them feel comfortable, it’s important not to give so much pressure by filling it in the congestion.
 The point is not gripping it so strongly and maintain relax while gripping it.
②The Bachi Manipulation
For arriving the destination
the passenger(bachi) can’t be selfish.
In order to not let the bachi get selfish and take a action by itself, the arm, the elbow and the fist have to coordinate and control it all together.
The point is not gripping it so strongly and maintain relax while gripping it.
②The Bachi Manipulation
For arriving the destination
the passenger(bachi) can’t be selfish.
In order to not let the bachi get selfish and take a action by itself, the arm, the elbow and the fist have to coordinate and control it all together. |
Fist: :The train, going to carry the passengers safety and comfortably.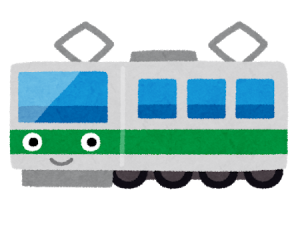 |
Bachi: The passengers
They are being led by the driver
 |
The direction should be consistent to the center of the taiko.
Direction of the elbow
A lot of people have their elbows going sideways,
so when they hit the taiko, the elbow is horizontal positioned to the face of taiko.
We need to correct it to the direction which it’s advancing forward.
Direction of the fist
How is the direction for the fist, after all?

| Hand tendon◎ |
Back of hand |
Palm |
We have now the goal and the route.
So next is the speed and the work.
How fast and productive can we achieve the goal?
And how much work can we produce?
I’ve said it previously here, but
in order to make a lot of work at once
is important to move the arm from the shoulder joint.
A train with six rolling stocks can carry the passengers with more productivity than a train with only one.
Using just the tip of the hand can’t produce so much power,
like hitting from the arm joint in the shoulder, which will make a big energy and work.
And the speed。
The thing with most important in the kinetic energy is the speed.
It’s just a simple calculation from the high school physics, but
when the speed get double, the kinetic energy doesn’t get the double, but the square.
A train at 50km/h
and a bullet train at 200 km/h
have a difference of kinetic energy by 16 times.
Comparing a speed of 10 km/h and 100 km/h
the kinetic energy is 100 times bigger.
In order to produce the speed effectively,
the key is in the flexibility movement in the bachi manipulation.
And the sound also varies from the mass of the object.
That’s why is important choosing wisely your bachi.
For the adequate movement we use the law of the lever and the law of inertia.
①Rising the arm
Triceps (back of the upper arm)
The elbow should be faced to the taiko’s face.
 |
②Bachi rotation(Detailed at “Bachi manipulation” article)
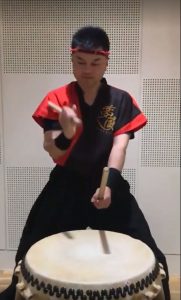 |
③Holding it firmly Movement = Sound
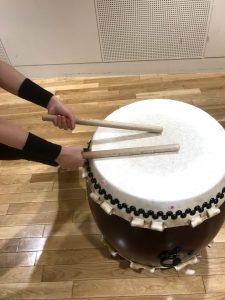
・from 15 to 20 cm to the taiko’s face.
・the bachi inclination is 45 degrees.
・the wrist is straight. (hitting by the bone)
Both fists must have the same height
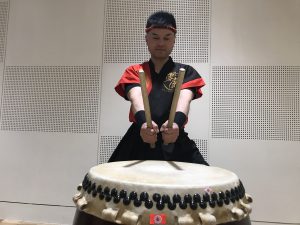 |
Bad example
so low
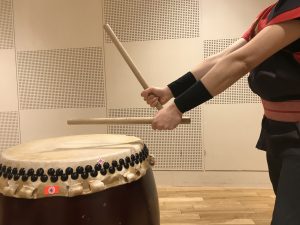 |
so high |
Verifying in a slow-motion video may be the fastest way for understanding the position, until both fists get gathered. |


 No5 wadaiko-tateuchi-basics-1-the-posture/
 No6 wadaiko-tateuchi-basics-2-the-bachi-manipulation
 No7 wadaiko-tateuchi-basics-3-the-don
 No8~No10【Wadaiko Tateuchi】Posture
 NO11~14 【Wadaiko Tateuchi】Basics Rhythms
 NO15~18【Wadaiko-Tateuchibasic-Edge-Hit/
 NO19~23【Wadaiko Tateuchi】Edge Hit short
NO24~31 【Wadaiko Tateuchi】BIG&small sound
NO32~34 【Wadaiko Tateuchi】rest
NO35~38 【Wadaiko Tateuchi】accent
NO39~43 【Wadaiko Tateuchi】Combine rhythm
NO44~47 【Wadaiko Tateuchi】Bouncing rhythm
NO48~53 【Wadaiko Tateuchi】 three beats
NO54~59 【Wadaiko Tateuchi】 three beats Edge Hit
NO60~63 【Wadaiko Tateuchi】Upside down procedure
#JapanesedrumBasic #JapaneseCulture #Japanesedrumworkshop
NO19~23【Wadaiko Tateuchi】Edge Hit short
NO24~31 【Wadaiko Tateuchi】BIG&small sound
NO32~34 【Wadaiko Tateuchi】rest
NO35~38 【Wadaiko Tateuchi】accent
NO39~43 【Wadaiko Tateuchi】Combine rhythm
NO44~47 【Wadaiko Tateuchi】Bouncing rhythm
NO48~53 【Wadaiko Tateuchi】 three beats
NO54~59 【Wadaiko Tateuchi】 three beats Edge Hit
NO60~63 【Wadaiko Tateuchi】Upside down procedure
#JapanesedrumBasic #JapaneseCulture #Japanesedrumworkshop